Node.js AWS Deployment Cheatsheet

Introduction⌗
I have written a Long and Detailed Article about deploying a Node.js application using AWS. This is a brief cheatsheet for quick lookups.
Creating a Ubuntu Linux Instance using AWS EC2⌗
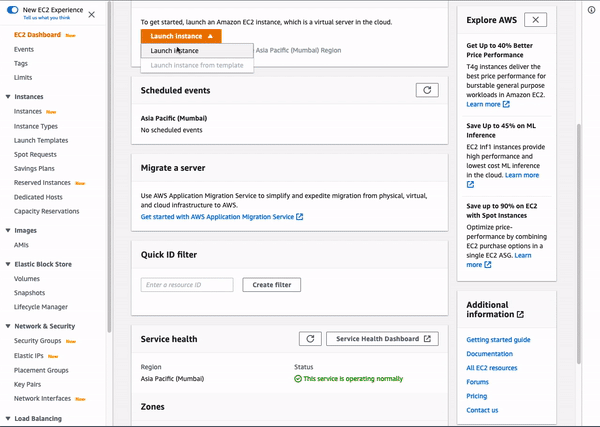
Creation of Instance - On the EC2 Dashboard, select the Launch Instance option.
Choose Amazon Machine Image (AMI) - Choose the Amazon Machine Image, this post is written in context of Ubuntu 20.04
Choose the Instance Type - t2.micro qualifies for free-tier, also this is sufficient for small web apps.
Instance Configuration - Leave the defaults, basically this section asks for no of instances (for scaling up the application), custom virtual private cloud (VPC) settings, IAM roles etc.
Storage - The defaults should suffice.
Security Groups - Add rules to allow traffic from HTTP and HTTPS.
Reviewing the Instance - In this step, we can see our AMI, instance type, security groups, storage and other info. Hit Launch to create the instance.
Upon Launch, we have to create a key-pair which is to be used as a private key for SSHing into our created instance. Create and store this key-pair safely.
A GIF walkthrough of the creation process
Connecting to the Instance⌗
Go to EC2 > Instances > Instance-ID > Connect to Instance -> SSH Client
chmod 400 - To protect a file against accidental overwriting.
chmod 400 "your-key.pem"
ssh -i /path/my-key-pair.pem my-instance-user-name@my-instance-public-dns-name
# Example
ssh -i "you-key.pem" ubuntu@ec2-xx-xx-xxx-xx.region.compute.amazonaws.com
Installing Node/NPM⌗
curl -fsSL https://deb.nodesource.com/setup_15.x | sudo -E bash -
sudo apt-get install -y nodejs
node --version
Check out the NodeSource link for detailed installation instructions on other platforms/versions.
Link to NodeSource for Node.js Binary Distributions: https://github.com/nodesource/distributions/blob/master/README.md
Cloning your project from Github/Bitbucket/Gitlab⌗
Connect your account via SSH and clone your repository.
Links for connecting SSH via Github/Gitlab/Bitbucket
Install all the associated Dependencies⌗
Go to your folder containing package.json and run,
# If using yarn, install yarn too.
# npm i -g yarn
yarn install

# Tests if any
yarn test
Setting up PM2 for Node.js⌗
# Install PM2 using NPM or Yarn

sudo npm i pm2 -g
# or
sudo yarn add global pm2

# Go to your app's entry file
pm2 start app.js # (or whatever your file name)
PM2 Commands for Reference⌗
Note: Refer to my longer article
You can use the below command to use your npm/yarn start script via PM2.
For running your npm.yarn start script in package.json
pm2 start yarn -- start
pm2 start npm -- start
Setting up NGINX⌗
sudo apt install nginx
Now, we need to change the default configuration.
cd /etc/nginx/sites-available
sudo vim default
Add the following snippet to the server block.
    server_name yourdomain.com www.yourdomain.com;

    location / {
        proxy_pass http://localhost:8000; # Whatever port your app runs on
        proxy_http_version 1.1;
        proxy_set_header Upgrade $http_upgrade;
        proxy_set_header Connection 'upgrade';
        proxy_set_header Host $host;
        proxy_cache_bypass $http_upgrade;
    }
Note: Explanation of the above Code Snippet listed on my longer article
After adding the above code snippet, check NGINX config for errors and restart nginx.
Run this to check NGINX config
sudo nginx -t
#output nginx: the configuration file /etc/nginx/nginx.conf syntax is ok nginx: configuration file /etc/nginx/nginx.conf test is successful
Restart NGINX service⌗
sudo service nginx restart
Now to check NGINX status,
sudo systemctl status nginx
# If you get this output then success!

● nginx.service - A high performance web server and a reverse proxy server
Loaded: loaded (/lib/systemd/system/nginx.service; enabled; vendor preset: enabled)
Active: active (running) since DAY YYYY-MM-DD HH:M:SS UTC; X days ago
Docs: man:nginx(8)
Main PID: xxxx (nginx)
Tasks: 2 (limit: 1160)
Memory: X M
CGroup: /system.slice/nginx.service
├─ xxxx nginx: master process /usr/sbin/nginx -g daemon on; master_process on;
└─xxxx nginx: worker process
You should now be able to visit your IP with no port (port 80) and see your app.
Setting up Custom Domain for our EC2 Instance⌗
Note: For detailed explanation check out my longer article
Setting up and managing DNS for a Custom Domain using domain name provider’s basic DNS⌗
All you have to do is create two A records in the DNS records section.


That’s it process complete, depending on your provider. It might take some time for the actual DNS propagation.
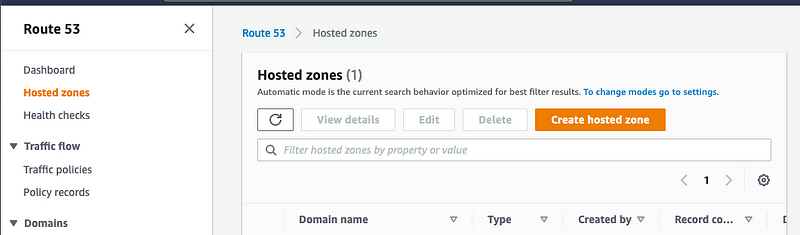
Setting up a Hosted zone and Managing DNS for a Custom Domain using Route53⌗
Note: Hosted Zone doesn’t come under a free-tier, hosted zone is paid.
Refer: https://aws.amazon.com/route53/pricing/
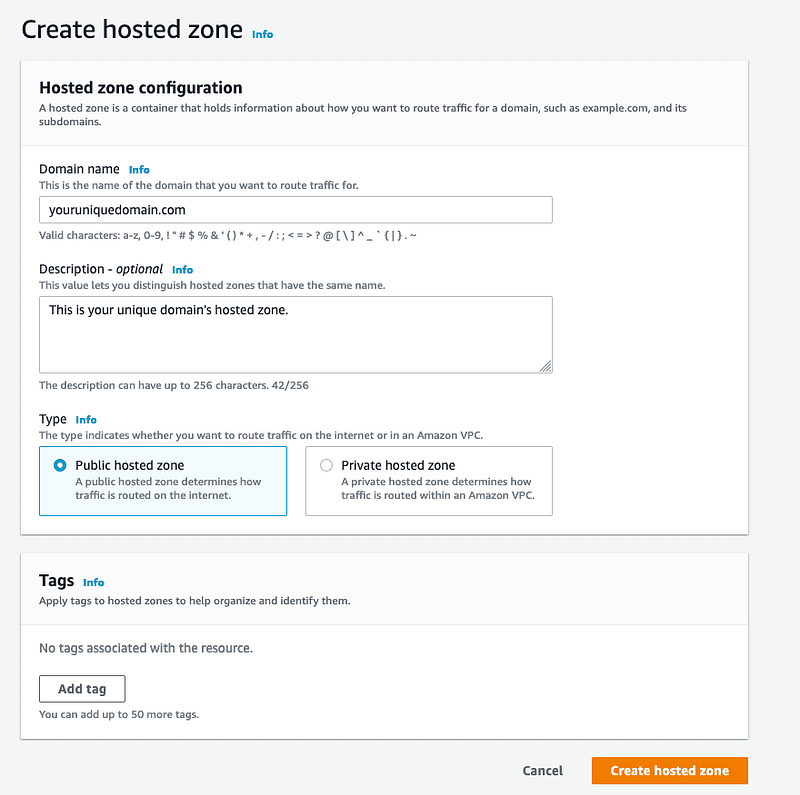
Create a hosted zone
Add your domain, description, type (public here) and hit Create hosted zone
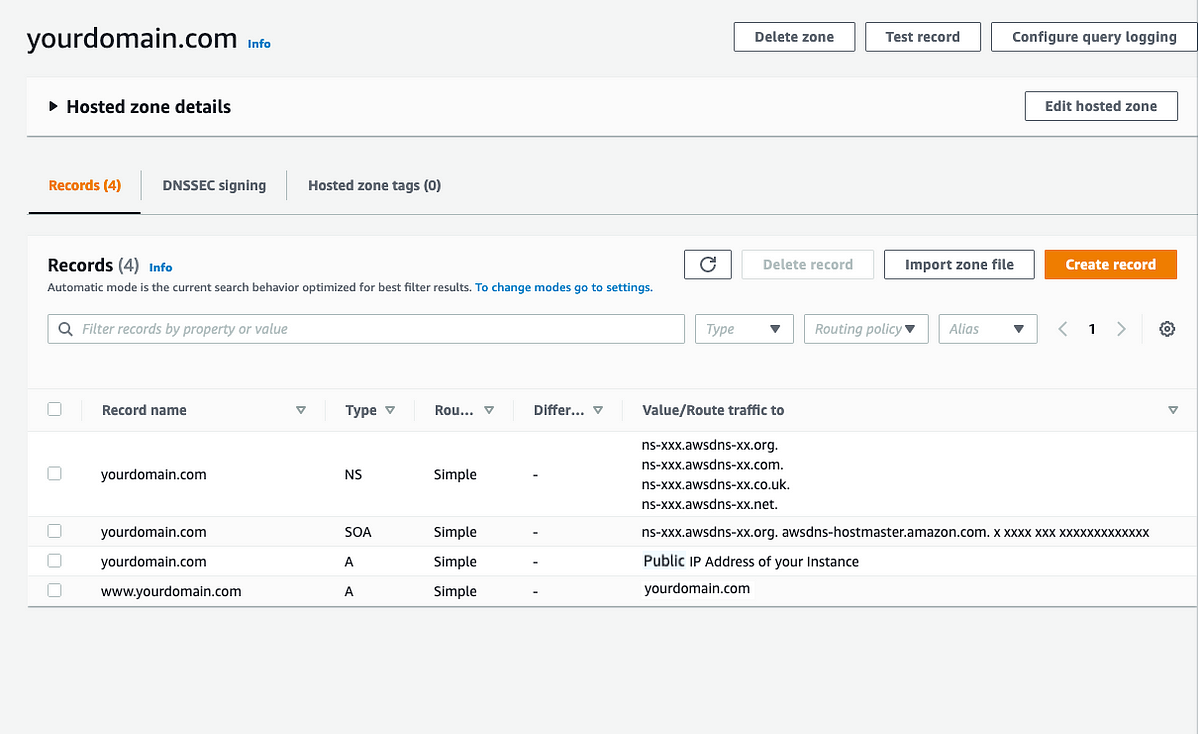
In the Hosted Zone dashboard, we can see the Record, Type, Value/Route traffic to options.
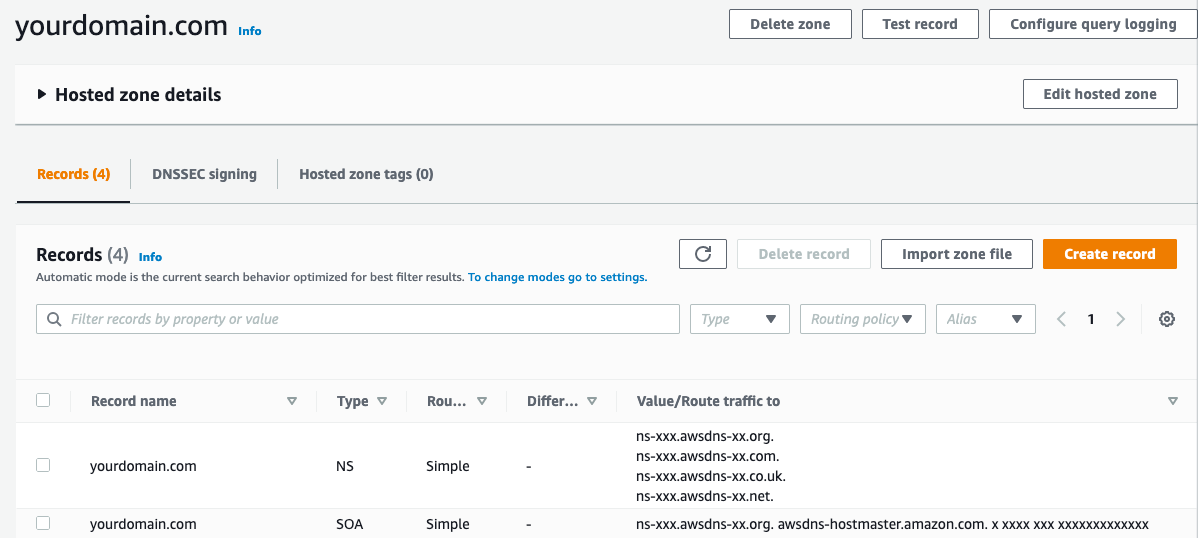
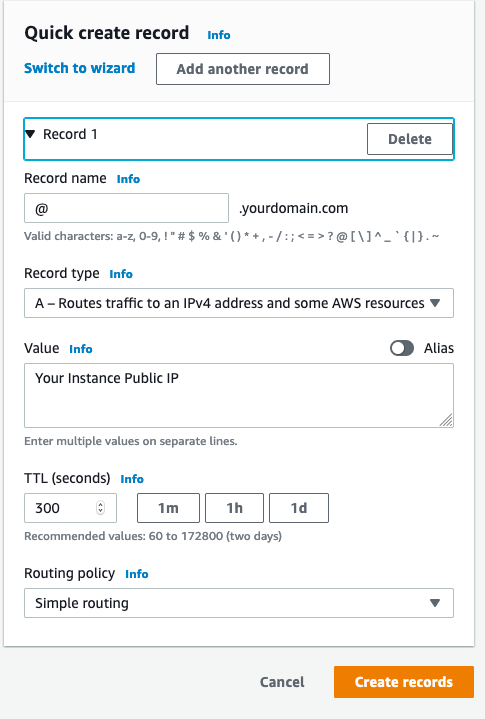
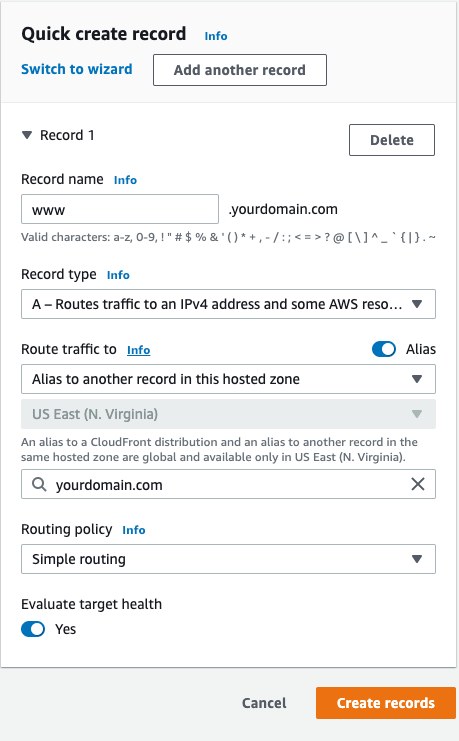
We need to create two A records, to route all traffic hitting yourdomain.com and www.yourdomain.com to the public ip of the created EC2 Instance.
Creating @ record
Creating WWW record
Now, the hosted zone dashboard should look like this.
Updating Name Server Records (NS)⌗
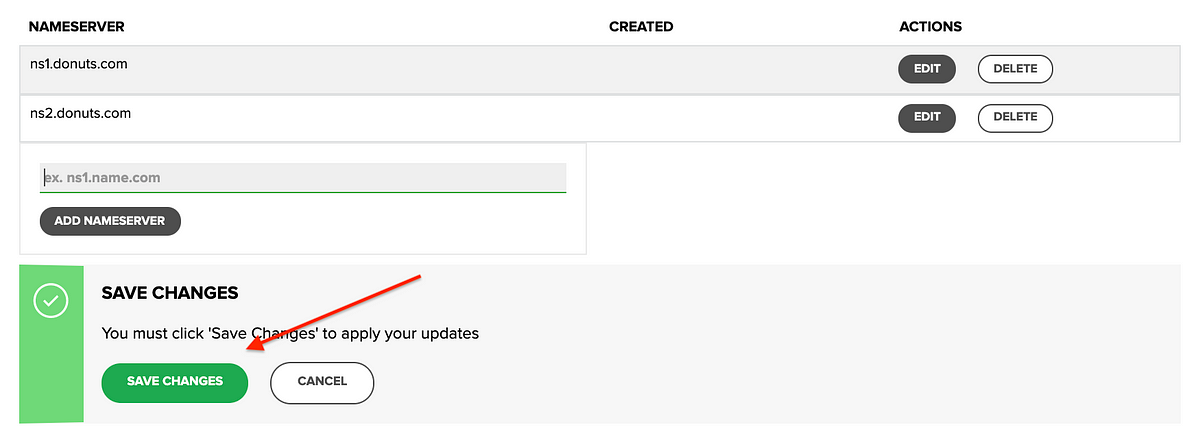
We need to add the NS Record values to our custom domain provider’s nameserver section.
Find the name server records associated with your domain.
ns-xxx.awsdns-xx.orgns-xxx.awsdns-xx.comns-xxx.awsdns-xx.co.ukns-xxx.awsdns-xx.net
Add them to your domain name provider’s Nameserver section.
Refer to my Long and Detailed Article
Name.com⌗
- You will need to remove all nsx.name.com records and add the above aws nsrecords associated with your domain.
Refer: https://www.name.com/support/articles/205934547-Changing-nameservers-for-DNS-management
Namecheap⌗

Similarly, add the nameservers to your domain name provider’s nameserver section.
Now, nameserver & DNS progression will take some time. You might have to wait up to 24 or above hours depending on your provider.
Mostly it happens in 1 hour or so, do check every hour. You can use nslookup or dig to check dns response. Sample nslookup and dig output given below.
Add SSL with LetsEncrypt for HTTPs⌗
SSL, or Secure Sockets Layer, is an encryption based Internet security protocol. A website that implements SSL/TLS has “HTTPS” in its URL instead of “HTTP.”
sudo add-apt-repository ppa:certbot/certbot
sudo apt-get update
sudo apt-get install python3-certbot-nginx
sudo certbot --nginx -d yourdomain.com -d www.yourdomain.com
Certbot can automatically configure SSL for Nginx.
Check NGINX Configuration
sudo nginx -t
Restart NGINX
sudo systemctl reload nginx
Certificate is only valid for 90 days. Test the renewal process with
certbot renew --dry-run
Now visit https://yourdomain.com and you would see your app.
Cheers!
Pic Credits: Photo by Long Phan